前言
本文以windows11,64位操作系统为例,介绍PyQt5环境的安装步骤。本文以windows11,64位操作系统为例,介绍PyQt5环境的安装步骤。
1.1 基本环境
Python3.x解释器环境,安装参考《windows11如何安装python3》
Pip包管理工具
Pipenv虚拟环境管理工具
C:\Users\Administrator>pip3 install pipenv
Collecting pipenv
  Downloading pipenv-2023.12.1-py3-none-any.whl (3.1 MB)
1.2 IDE安装
PyCharm安装,参考《windows11安装pycharm》
1.3 GUI开发环境
1.3.1 全局安装
全局安装,直接安装到python的安装路径,建议使用后面步骤的《虚拟环境安装》。
PyQt5安装
Pip install PyQt5 -I https://pypi.douban.com/simple
辅助工具安装
Pip install PyQt5-tools -I https://pypi.douban.com/simple
-i指明安装地址,默认安装地址为官方地址,速度慢可能安装失败。
1.3.2 虚拟环境安装
使用虚拟环境安装,可以避免干扰全局环境,pipevn方便整个项目依赖包的管理。在其他机器上可以根据Pipfile文件和Pipfile.lock快速安装整个项目。
创建虚拟环境(python3.x版本解释器),cd到项目路径,pipenv --python 3
修改镜像:清华:https://pypi.tuna.tsinghua.edu.cn/simple
Pipfile文件配置source地址。
激活环境:pipenv shell
安装三方库:pipenv install pyqt5
Pipenv install pyqt5-tools
创建虚拟环境生成Pipfile文件,安装第三方库生成Pipfile.lock文件,同时更新Pipfile文件,都可用文本工具查看。Pipfile.lock为虚拟环境中安装的第三方库信息。
1.3.2.1 创建虚拟环境
创建基于python3的虚拟环境
# rem 打开cmd窗口,cd 到 D:\pycharmworkspace\pyqt5
# rem 在当前目录创建基于python3的虚拟环境
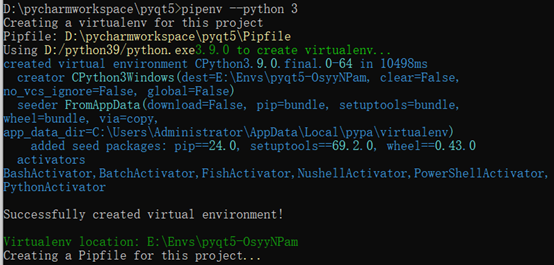
D:\pycharmworkspace\pyqt5>pipenv --python 3
Creating a virtualenv for this project
Pipfile: D:\pycharmworkspace\pyqt5\Pipfile
Using D:/python39/python.exe3.9.0 to create virtualenv...
created virtual environment CPython3.9.0.final.0-64 in 10498ms
  creator CPython3Windows(dest=E:\Envs\pyqt5-OsyyNPam, clear=False,
no_vcs_ignore=False, global=False)
  seeder FromAppData(download=False, pip=bundle, setuptools=bundle,
wheel=bundle, via=copy,
app_data_dir=C:\Users\Administrator\AppData\Local\pypa\virtualenv)
    added seed packages: pip==24.0, setuptools==69.2.0, wheel==0.43.0
  activators
BashActivator,BatchActivator,FishActivator,NushellActivator,PowerShellActivator,
PythonActivator

Successfully created virtual environment!

Virtualenv location: E:\Envs\pyqt5-OsyyNPam
Creating a Pipfile for this project...

D:\pycharmworkspace\pyqt5>
Pipenv指定python版本
# rem 创建一个使用Python 3的虚拟环境
pipenv --python 3
rem 创建指定Python版本路径的虚拟环境
pipenv --python D:\python39
Pipfile文件
创建成功后,在项目目录生成Pipfile文件,内容如下:
[[source]]
url = "https://pypi.org/simple"
verify_ssl = true
name = "pypi"

[packages]

[dev-packages]

[requires]
python_version = "3.9"
python_full_version = "3.9.0"
其中,url为第三方库的下载地址,需将其修改为国内镜像地址,比如,清华镜像地址:https://pypi.tuna.tsinghua.edu.cn/simple。
1.3.2.2 激活虚拟环境
# rem 打开虚拟环境 pipenv shell
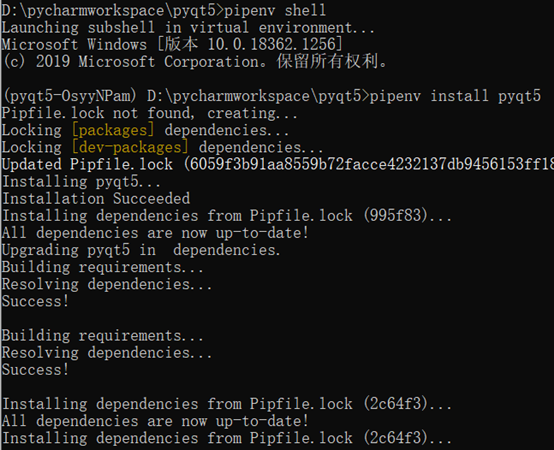
D:\pycharmworkspace\pyqt5>pipenv shell
Launching subshell in virtual environment...
Microsoft Windows [版本 10.0.18362.1256]
(c) 2019 Microsoft Corporation。保留所有权利。

(pyqt5-OsyyNPam) D:\pycharmworkspace\pyqt5>

1.3.2.3 安装pyqt5
# rem 安装pyqt5 pipenv install pyqt5
(pyqt5-OsyyNPam) D:\pycharmworkspace\pyqt5>pipenv install pyqt5
Pipfile.lock not found, creating...
Locking [packages] dependencies...
Locking [dev-packages] dependencies...
Updated Pipfile.lock (6059f3b91aa8559b72facce4232137db9456153ff1809bc90cbffab09d995f83)!
Installing pyqt5...
Installation Succeeded
Installing dependencies from Pipfile.lock (995f83)...
All dependencies are now up-to-date!
Upgrading pyqt5 in  dependencies.
Building requirements...
Resolving dependencies...
Success!

Building requirements...
Resolving dependencies...
Success!

Installing dependencies from Pipfile.lock (2c64f3)...
All dependencies are now up-to-date!
Installing dependencies from Pipfile.lock (2c64f3)...
1.3.2.4 安装pyqt5-tools
# rem 安装pyqt5-tools
# rem pipenv install pyqt5-tools
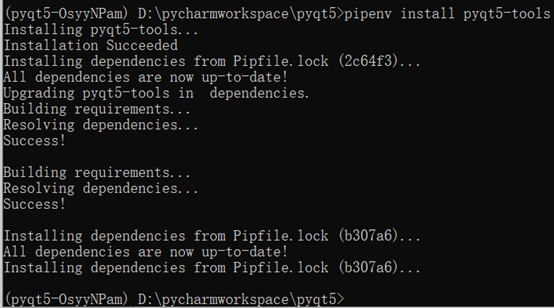
(pyqt5-OsyyNPam) D:\pycharmworkspace\pyqt5>pipenv install pyqt5-tools
Installing pyqt5-tools...
Installation Succeeded
Installing dependencies from Pipfile.lock (2c64f3)...
All dependencies are now up-to-date!
Upgrading pyqt5-tools in  dependencies.
Building requirements...
Resolving dependencies...
Success!

Building requirements...
Resolving dependencies...
Success!

Installing dependencies from Pipfile.lock (b307a6)...
All dependencies are now up-to-date!
Installing dependencies from Pipfile.lock (b307a6)...

(pyqt5-OsyyNPam) D:\pycharmworkspace\pyqt5>
1.4 配置虚拟环境
本文pyqt5项目路径为:D:\pycharmworkspace\pyqt5
通过前面步骤“创建虚拟环境”后,其对应的虚拟环境路径为:E:\Envs\pyqt5-OsyyNPam
此时,通过pycharm打开次pyqt5项目,它的解释器应该会自动配置为虚拟环境路径下的解释器,若是如此,跳过本章节的配置,否则,可参考本章节配置虚拟环境。
1.4.1 打开pycharm
1.4.2 打开pyqt5项目

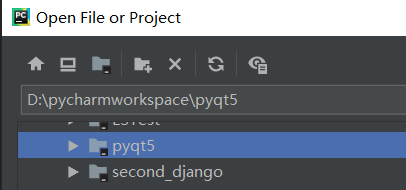
1.4.3 配置解释器
(1)选择pyqt5项目,点击“File-settings”
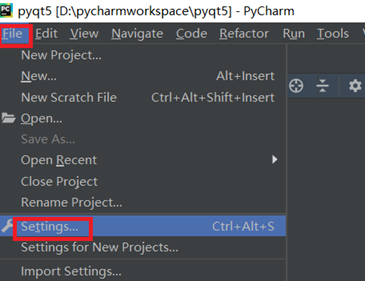 (2)点击“Project:pyqt5-Project Interpreter-齿轮”

(3)点击“show all”

(4)点击“+”进行添加解释器
 (5)点击“Virtualenv Environment-Existing environment-…”

(6)选择之前创建的虚拟环境pyqt5的解释器路径

(7)点击“OK”
最终解释器配置如下:
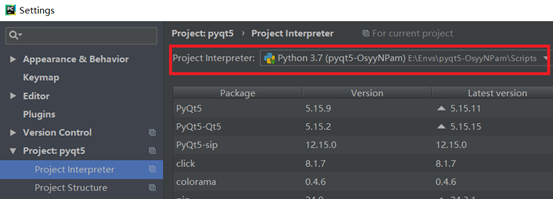
1.5 验证环境
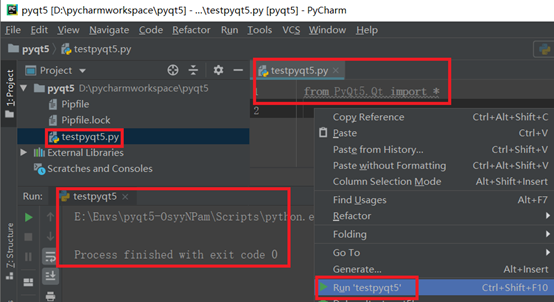
在pycharm的pyqt5项目,新建一个testpyqt5.py的文件。
输入如下内容:
from PyQt5.Qt import *
保存后,右键“Run ‘testpyqt5’ ”运行如下,说明配置成功:
